kubevirt-crc-windows-tutorial
Running a Window Framework (NOT .NET Core) app on Kubernetes using CodeReady Containers and Kubevirt
This tutorial will guide you through the process of getting kubevirt running inside of OpenShift, and then using kubevirt to host a Windows VM in OpenShift. That Windows VM will be running an IIS-powered web site and a .NET Framework WCF service application.
Glossary/Acronyms
CLI: Command-Line Interface
CRC: CodeReady Containers
VM: Virtual Machine
Prerequisites
CodeReady Containers
kubectl CLI
oc CLI
virtctl CLI
cdi CLI
Prepare CRC
The default VM that is created by CRC is too small at 30GB. It must be resized to just over 100GB in order for this tutorial to work.
The steps are:
- Create a VM
- Stop CRC
- Resize the VM
- Start CRC and continue with the tutorial.
Set VM memory
Make sure the VM has enough RAM in order to keep performance acceptable. More is better in this case. We’ll set aside about 12GB of RAM.
crc config set memory 12000
Start in order to be a VM
crc start
Stop
After CRC has started, there is no reason (yet) to sign in. Immediately stop CRC (and the VM in the procss) so the VM can be resized.
crc stop
Resize the VM
Now, add 75GB to the VM by running the makebig script:
./makebig.sh
Start
Now we can start CRC and proceed with the tutorial.
crc start
That will supply you with the proper login information.

Log in and set your operating environment.
Login…
oc login -u kubeadmin -p your_password_goes_here https://api.crc.testing:6443
For example, oc login -u kubeadmin -p cznQP-n4pBk-cnXTg-nkevH https://api.crc.testing:6443
…set the oc command environment…
eval (crc oc-env)
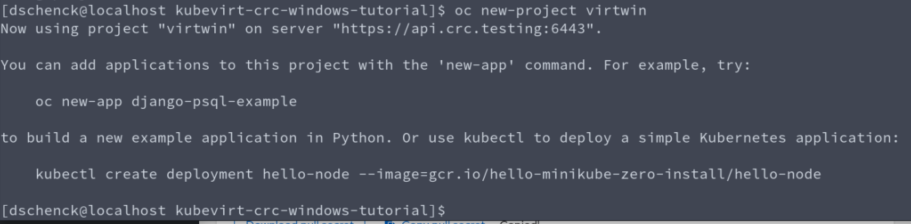
…and create your new project
oc new-project virtwin
Install kubevirt Operator
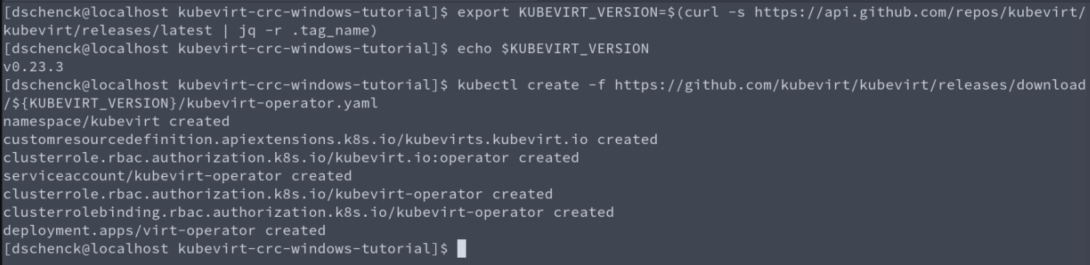
This first part will get the current version number (e.g. 0.25.0) into an environment variable.
export KUBEVIRT_VERSION=$(curl -s https://api.github.com/repos/kubevirt/kubevirt/releases/latest | jq -r .tag_name)
kubectl create -f https://github.com/kubevirt/kubevirt/releases/download/${KUBEVIRT_VERSION}/kubevirt-operator.yaml
$env:KUBEVIRT_VERSION = (ConvertFrom-Json (curl https://api.github.com/repos/kubevirt/kubevirt/releases/latest).content)[0].tag_name
kubectl create -f https://github.com/kubevirt/kubevirt/releases/download/$env:KUBEVIRT_VERSION/kubevirt-operator.yaml
Create instance of kubevirt Operator
With the kubevirt Operator installed, we next need to invoke an instance of kubevirt. After this command is run, seven pods will be created and running in the namespace “kubevirt”. At that point, kubevirt is up and running.
kubectl create -f https://github.com/kubevirt/kubevirt/releases/download/${KUBEVIRT_VERSION}/kubevirt-cr.yaml
kubectl create -f https://github.com/kubevirt/kubevirt/releases/download/$env:KUBEVIRT_VERSION/kubevirt-cr.yaml

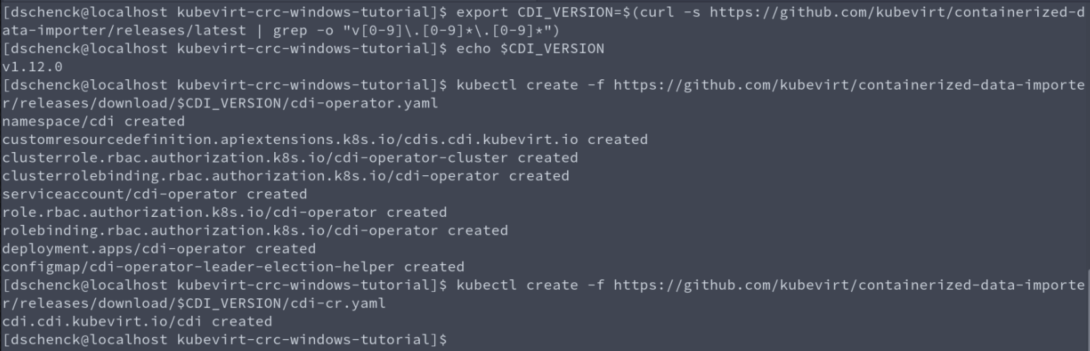
Install CDI
The Containerized Data Importer, or CDI, must be installed in our kubernetes (OpenShift) cluster in order to upload the Windows VM.
The first step captures the CDI’s version number in an environment variable to be used in the two later steps.
export CDI_VERSION=$(curl -s https://github.com/kubevirt/containerized-data-importer/releases/latest | grep -o "v[0-9]\.[0-9]*\.[0-9]*")
kubectl create -f https://github.com/kubevirt/containerized-data-importer/releases/download/$CDI_VERSION/cdi-operator.yaml
kubectl create -f https://github.com/kubevirt/containerized-data-importer/releases/download/$CDI_VERSION/cdi-cr.yaml
$env:CDI_VERSION = (curl https://github.com/kubevirt/containerized-data-importer/releases/latest | Select-String "v[0-9]\.[0-9]*\.[0-9]*").matches | select -exp value
kubectl create -f https://github.com/kubevirt/containerized-data-importer/releases/download/$env:CDI_VERSION/cdi-operator.yaml
kubectl create -f https://github.com/kubevirt/containerized-data-importer/releases/download/$env:CDI_VERSION/cdi-cr.yaml
Upload VM image
virtctl image-upload dv windows --size=50Gi --image-path=Summit2019.raw --insecure

Create VM
oc apply -f vm-windows.yml
Tweak file permissions
Here’s where things get a bit tricky. Kubevirt was originally intended to run on a bare metal kubernetes installation, and we’re using CodeReady Containers – a VM running kubernetes (and OpenShift). In addition, we’ll be using CRC’s supplied Persistent Volumes (PV) for our storage. Those PVs don’t have the correct permissions for our kubevirt instance, so we need to change the top-level directory’s permissions.
The error, which appears in the “Events” tab when you view the virtual machine in the OpenShift dashboard, is the following:
“(…/var/run/kubevirt-private/vmi-disks/pvcvolume/disk.img’: Permission denied’)”
The workaround is to run a command inside the pod that control the virtual machine, a command that will grant access to the VM.
First, get the pod identifier:
IF YOU HAVE AWK INSTALLED ON YOUR PC:
export VM_POD_ID=$(oc get pods | sed -n 2p | awk '{print $1}')
oc exec $VM_POD_ID chmod 777 /var/run/kubevirt-private/vmi-disks/pvcvolume
If you DO NOT have AWK installed on your PC:
oc get pods
It will follow the pattern of “virt-windows-app-server-____”.
Then, use the pod id in the following command:
oc exec {POD_ID_GOES_HERE} chmod 777 /var/run/kubevirt-private/vmi-disks/pvcvolume
After running this command, in order to speed things up, you may want to restart the VM.
Start the cluster dashboard/console
In another terminal session on the host, launch the OpenShift console in your default browser by running the following command:
crc console
Log in as user “kubedamin”, using the same password that you used to log in at the comand line, earlier.
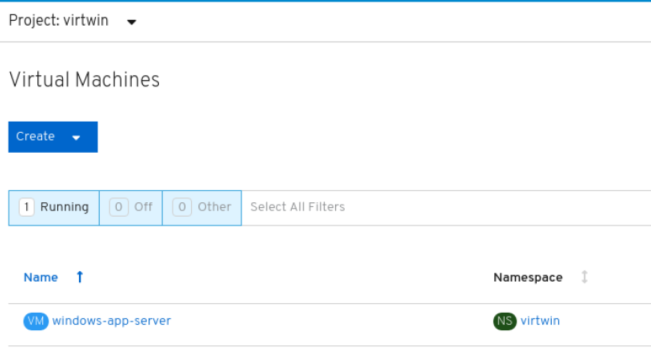
Using the console, you can watch the Windows VM start.
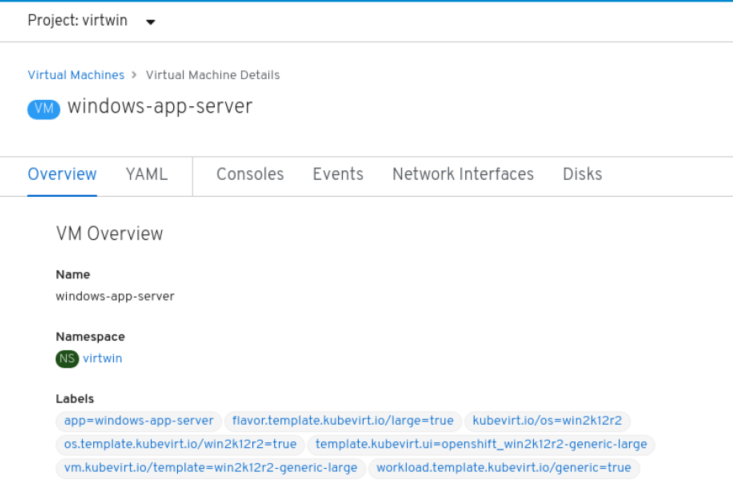
Under the “Workloads” section of the menu, select the “Virtual Machines” option. Make sure you are in the project “virtwin”, and you can see the VM entitled “windows-app-server” listed.
Click on the VM name (windows-app-server) in order to view the details for the VM. Once there, use the “Consoles” tab to see the VM start.

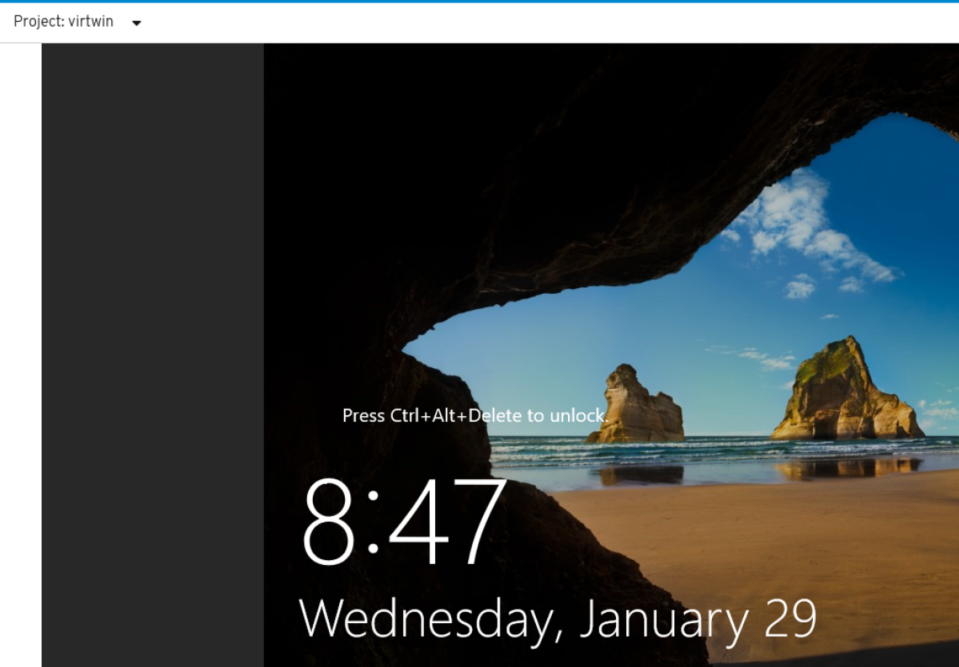
After the VM has started, you can see that no RDP is available.
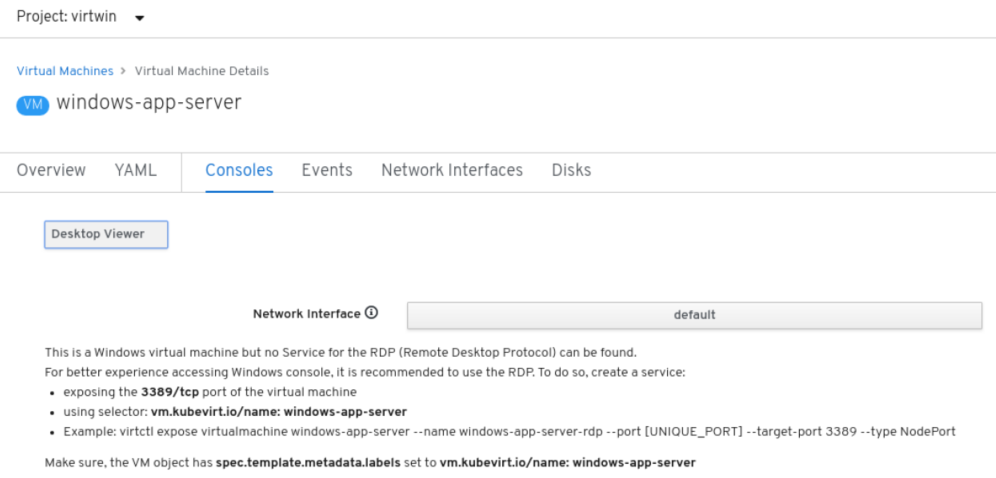
Create Remote Desktop Protocol (RDP) service
virtctl expose virtualmachine windows-app-server --name windows-app-server-rdp --port 3389 --target-port 3389 --type NodePort

After running the command, you can return to the dashboard and see that the RDP function is now available.
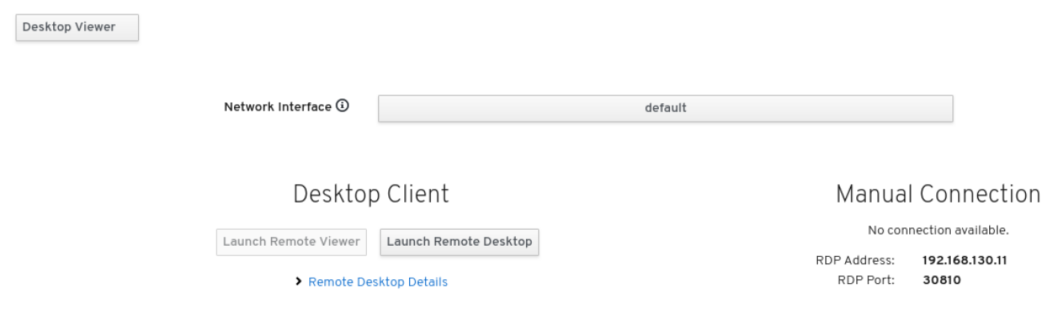
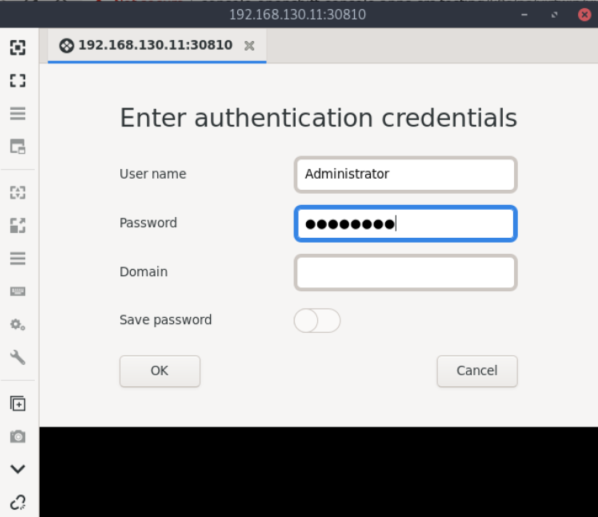
Log in using RDP
Use the Remote Desktop option and sign in to the Windows VM. Note: the password is Pa$$word
IMPORTANT
Note that there appears to be some defect with respect to the RDP function. If you disconnect or log out from the Windows VM, you will need to restart the VM in order to use RDP again.
Create web Service
virtctl expose virtualmachine windows-app-server --name windows-app-server-web --port 80 --target-port 80 --protocol="TCP"
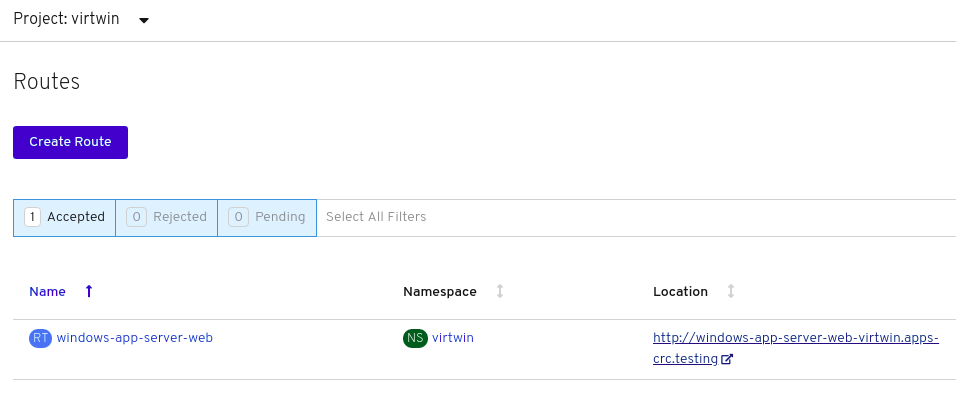
Create Routes
oc expose service windows-app-server-web
View web site
Inside the web dashboard, open the “Networking” section and select the “Routes” option. You will see the route to the web site. Clock on the URL to open the Wingtip Toys web site in your browser.
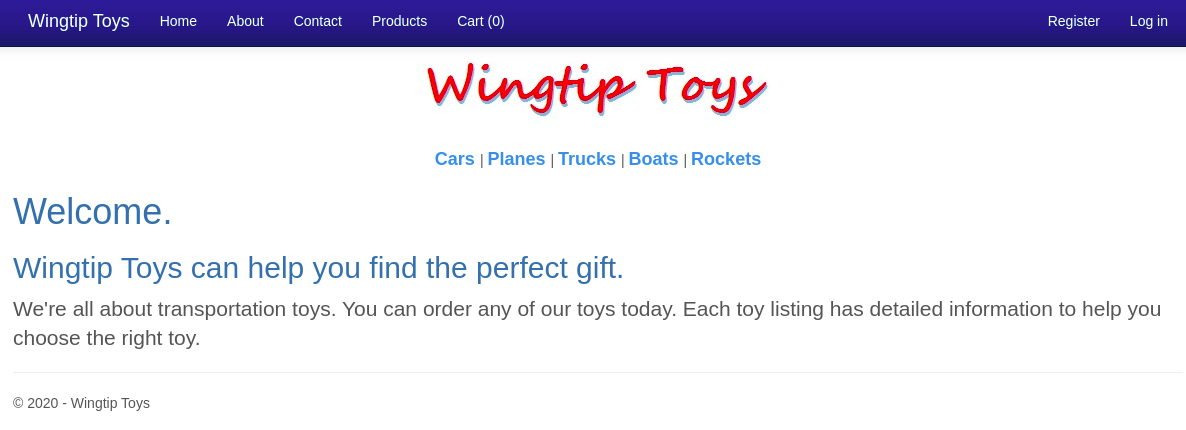
Congratulations
You now have a .NET Frameworks web site, and an instance of MS SQL Server, running on a VM in kubernetes.